Tag Archives: mass media
Escher, shake hands with your shadow
Reminds me of King Crimson
Music to fill your day…
What sloppy code looks like in process
I never said I was a clean software code writer.
I write code like I draw — tracing and [re]sketching until I get a good feel for the drawing technique.
These lines of code are my “doodles”:
/* Read
twoone ultrasonic sensorsand two PIR sensors, control five LEDs and two servos
Based on code by
David A. Mellis, Tom Igoe,
Kimmo Karvinen and Tero Karvinen
Updated by Joe Saavedra, 2010
http://BotBook.com
*/
/*****************************************************************************/
// Function: If the sensor detects movement in its detecting range,
// the LED is turned on. Otherwise, the LED is turned off.
// Hardware: Grove – PIR Motion Sensor, Grove – LED
// Arduino IDE: Arduino-1.0
// Author: Frankie.Chu
// Date: Jan 21,2013
// Version: v1.0
// by http://www.seeedstudio.com
// Modified by: RadioShack Corporation
// Date: July 18, 2013
//
// This library is free software; you can redistribute it and/or
// modify it under the terms of the GNU Lesser General Public
// License as published by the Free Software Foundation; either
// version 2.1 of the License, or (at your option) any later version.
//
// This library is distributed in the hope that it will be useful,
// but WITHOUT ANY WARRANTY; without even the implied warranty of
// MERCHANTABILITY or FITNESS FOR A PARTICULAR PURPOSE. See the GNU
// Lesser General Public License for more details.
//
// You should have received a copy of the GNU Lesser General Public
// License along with this library; if not, write to the Free Software
// Foundation, Inc., 51 Franklin St, Fifth Floor, Boston, MA 02110-1301 USA
//
/*******************************************************************************/
/*macro definitions of PIR motion sensor pins and LED pins*/
#define PIR_MOTION_SENSOR_LEFT 2//Use pin 2 to receive the signal from the left PIR module
#define PIR_MOTION_SENSOR_RT 5//Use pin 5 to receive the signal from the right PIR module
#define LED_LEFT 6//the LED is connected to D6 of Arduino
#define LED_RT 9//the LED is connected to D9 of Arduino
// Number Two: Sweep
// by BARRAGAN
// For more information on this circuit, go to http://www.oomlout.com/oom.php/products/ardx/circ-04/*#define trigPin 12 // from forum.arduino.cc
#define echoPin 13 // from forum.arduino.cc*/
#include <Servo.h>Servo myservo1; // create servo object to control a servo
Servo myservo2; // a maximum of eight servo objects can be createdint pos = 0; // variable to store the servo position
//const int leftPing = 3;
const int rightPing = 12;//const int leftPIRLed = 6;
//const int leftUSLed1 = 7;
const int rightUSLed1 = 8;
//const int rightPIRLed = 9;
//const int leftUSLed2 = 10;
//const int leftUSLed3 = 11;
const int rightUSLed2 = 11;
const int rightUSLed3 = 3;const int closeD = 10; // cm; maximum closest distance – 0 to 10 cm range
const int midD = 20; // cm; maximum hand distance – 10 to 20 cm range
const int farD = 30; // cm; maximum farthest distance – 20 to 30 cm rangevoid setup()
{
myservo1.attach(10); // attaches the servo 1 on pin 10 to the servo object
myservo2.attach(4); // attaches the servo 2 on pin 4 to the servo object
pinsInit();Serial.begin(9600);
// pinMode(leftPIRLed, OUTPUT);
// pinMode(leftUSLed1, OUTPUT);
// pinMode(leftUSLed2, OUTPUT);
// pinMode(leftUSLed3, OUTPUT);
// pinMode(rightPIRLed, OUTPUT);
pinMode(rightUSLed1, OUTPUT);
pinMode(rightUSLed2, OUTPUT);
pinMode(rightUSLed3, OUTPUT);//pinMode(trigPin, OUTPUT); //from forum.arduino.cc
//pinMode(echoPin, INPUT); //from forum.arduino.cc
}void loop()
{
if(isPeopleDetectedLeft())//if the left PIR sensor detects movement, turn on LED.
turnOnLEDLeft();
else//if the left PIR sensor does not detect movement, do not turn on LED.
turnOffLEDLeft();
if(isPeopleDetectedRt())//if the right PIR sensor detects movement, turn on LED.
turnOnLEDRt();
else//if the right PIR sensor does not detect movement, do not turn on LED.
turnOffLEDRt();
// ping(leftPing, leftUSLed1, leftUSLed2, leftUSLed3);
ping(rightPing, rightUSLed1, rightUSLed2, rightUSLed3);
// delay(500);
/*int duration, distance,pos=0,i;
digitalWrite(trigPin, LOW);
delayMicroseconds(2);
digitalWrite(trigPin, HIGH);
delayMicroseconds(10);
digitalWrite(trigPin, LOW);
duration = pulseIn(echoPin, HIGH);
distance = (duration/2)/29.1;
Serial.print(distance);
Serial.println(” cm”);
//if(distance<15)
if(rightPing<5)
{
myservo.write(90);
}
else{
myservo.write(0);
}
delay(10);*//* for(pos = 0; pos < 180; pos += 1) // goes from 0 degrees to 180 degrees
{ // in steps of 1 degree
myservo.write(pos); // tell servo to go to position in variable ‘pos’
delay(15); // waits 15ms for the servo to reach the position
}
for(pos = 180; pos>=1; pos-=1) // goes from 180 degrees to 0 degrees
{
myservo.write(pos); // tell servo to go to position in variable ‘pos’
delay(15); // waits 15ms for the servo to reach the position
}*/
}void pinsInit()
{
pinMode(PIR_MOTION_SENSOR_LEFT, INPUT);
pinMode(LED_LEFT,OUTPUT);
pinMode(PIR_MOTION_SENSOR_RT, INPUT);
pinMode(LED_RT,OUTPUT);}
void turnOnLEDLeft()
{
digitalWrite(LED_LEFT,HIGH);
myservo2.write(180);
}
void turnOffLEDLeft()
{
digitalWrite(LED_LEFT,LOW);
myservo2.write(90);
}
void turnOnLEDRt()
{
digitalWrite(LED_RT,HIGH);
myservo2.write(0);
}
void turnOffLEDRt()
{
digitalWrite(LED_RT,LOW);
myservo2.write(90);
}
/***************************************************************/
/*Function: Detect whether there is movement in the PIR sensor’s detecting range*/
/*Return:-boolean, true is movement is detected.*/
boolean isPeopleDetectedLeft()
{
int sensorValue = digitalRead(PIR_MOTION_SENSOR_LEFT);
if(sensorValue == HIGH)//if the sensor value is HIGH?
{
return true;//yes,return true
}
else
{
return false;//no,return false
}
}
boolean isPeopleDetectedRt()
{
int sensorValue = digitalRead(PIR_MOTION_SENSOR_RT);
if(sensorValue == HIGH)//if the sensor value is HIGH?
{
return true;//yes,return true
}
else
{
return false;//no,return false
}
}
boolean ping(int pingPin, int ledPin1, int ledPin2, int ledPin3)
{
int d = getDistance(pingPin); // cm
boolean pinActivated1 = false;
boolean pinActivated2 = false;
boolean pinActivated3 = false;
if (d < closeD) {
digitalWrite(ledPin1, HIGH);
digitalWrite(ledPin2, LOW);
digitalWrite(ledPin3, LOW);
myservo1.write(180);
pinActivated1 = true;
pinActivated2 = false;
pinActivated3 = false;
} else {
if (d < midD) {
digitalWrite(ledPin1, LOW);
digitalWrite(ledPin2, HIGH);
digitalWrite(ledPin3, LOW);
myservo1.write(90);
pinActivated1 = false;
pinActivated2 = true;
pinActivated3 = false;
}
else {
digitalWrite(ledPin1, LOW);
digitalWrite(ledPin2, LOW);
digitalWrite(ledPin3, HIGH);
myservo1.write(0);
pinActivated1 = false;
pinActivated2 = false;
pinActivated3 = true;
}
}
return pinActivated1, pinActivated2, pinActivated3;
}int getDistance(int pingPin)
{
long duration, inches, cm;pinMode(pingPin, OUTPUT);
digitalWrite(pingPin, LOW);
delayMicroseconds(2);
digitalWrite(pingPin, HIGH);
delayMicroseconds(5);
digitalWrite(pingPin, LOW);pinMode(pingPin, INPUT);
duration = pulseIn(pingPin, HIGH);inches = microsecondsToInches(duration);
cm = microsecondsToCentimeters(duration);
Serial.print(inches);
Serial.print(“in, “);
Serial.print(cm);
Serial.print(“cm”);
Serial.println();
return(cm); // You could also return inches
}long microsecondsToInches(long microseconds)
{
return microseconds / 74 / 2;
}long microsecondsToCentimeters(long microseconds)
{
return microseconds / 29 / 2;
}
Whudyasay?

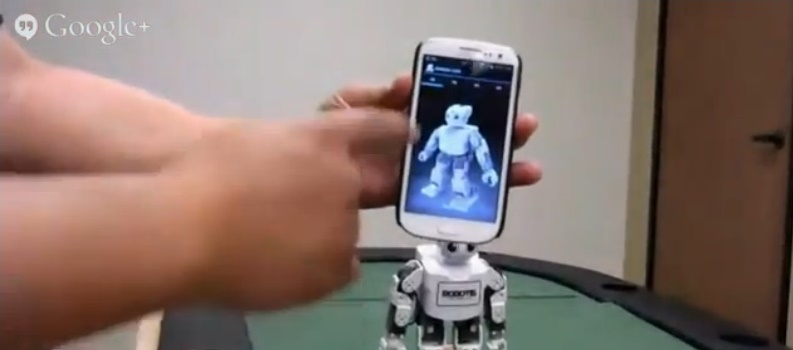
Make: Robotic Hacks, the Robotic Experts presentation
Tonight on a Google+ Hangout, we listened to a group of robotic experts, many in the 3D DIY printing specialty, who talked about their creations:
…second installment of Robot Hacks, a Maker Session.
This will be a team presentation featuring +Michael Overstreet (I, bioloid) talking about his 3D printed humanoid robotic projects; Aaron Park (Robotis) open sourced DARwIn-mini, Dr Chi Thai (University of Georgia) and +Michael Paulishen programming the open sourced CM-904; +Erin RobotGrrl shows us RoboBrrd and her 3D printed robot; +Heriberto Reynoso (NASA) teaches kids how to build and program robots; and +lem fugitt talks about robot developments outside of the US and the application of 3D printing to robot design.Join the conversation on the Robot Hacks community page.
Robot Hacks is the latest Maker Session presented by Make magazine and +General Electric. This 3 week program is designed to engage teams of makers around the world to participate in an open source “Robot Hacking and Making” program.
The standout image for me amongst all the cool ideas and commercial products?
A high school robotics education program:

To be clear, robotic development programs by full-grown humans is important but we old ones (say, age 35+) are merely pointing the way for the next generation.
In any case, here are some more screenshots of tonight’s presenters with their “children”:

Oops! Technical difficulties — video echo, echo echo echoechoecho…

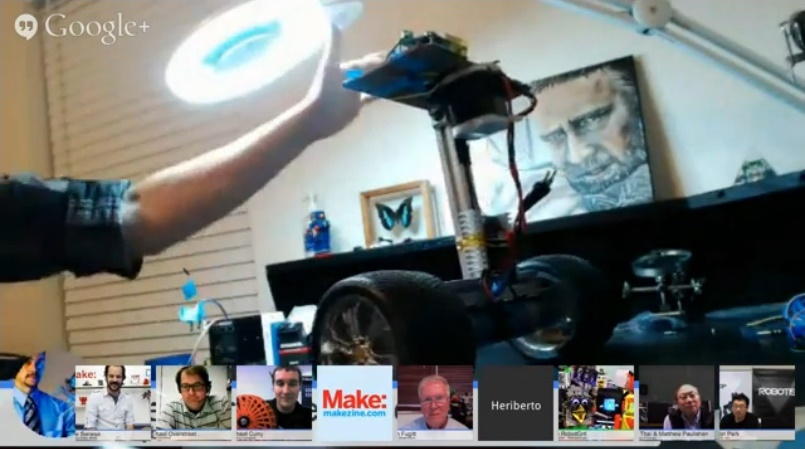


Thanks to everyone involved, including the behind-the-scenes people who maintain servers/routers, design webcams and otherwise keep the Internet loosely bound together across the globe and beyond!
Preproductpreannouncement
In an attempt to counter the competition before it comes up with an over-the-counter product under-the-table and off-the-shelf commercially, the team that brings good things to light (or was that “we bring good things to life?”), together with the team that puts the intel inside the intel inside, in conjunction with the team that promotes the tiny mouse that roars (or is that the Minnie Mouse that roars at Mickey?), has announced a new line.
Bringing back the Nosferatu in nostalgia (or is that the pleurisy in heresy? (or hypocrisy in plutocracy?)), the team of teams threw a mad dash to a flash mob and popped up a tent in the middle of Times Square (because the crash party at Tienanmen Square had already closed down that block).
They demonstrated an open source set of proprietary software modules that can be downloaded into their new line of 3D printers that will allow you to personalise your own characters that fit into a kid’s Carousel of Progress Playhouse, complete with miniature version of yourself dressed in Mickey Mouse ears (or Minnie (or Goofy (or Pluto (no, not Pluto, he’s no longer fully-qualified to orbit on the same planetary plane as the other characters)))).
For the adult in the kid in you, you can print a scale model of yourself that includes self-powered swappable body parts that are recharged wirelessly (“No more bulky power pack! ”Your minime will automatically locate and lie down on the recharging pad just like you taking a nap to recharge if you want a full recharge! If not, your minime will be able to remove any ‘tired’ body part and swap in a fully-charged one!”); the smallest scale version will be prewired for plugging in body parts and the largestscale version will include body parts that communicate wirelessly with each other, reducing the number of wires in the body.
Watch “Production Photo Slideshow – I Charleston Huntsville” on YouTube
The duh factor
So, today I’ve spent several hours with the design team deciding what we want our dancing mannequins to be.
I’ll get to that in a minute or two.
Meanwhile, I’ve been uncrating and sorting the parts for the Arduino kit, starting to wire up the PIR/ultrasonic sensor array for controlling the dancing mannequins.
Wired up everything just fine.
Wrote some code in the Arduino programming environment and compiled just fine.
One small problem — couldn’t program the Arduino Uno.
Enter the duh factor — I had chosen the wrong COM port.
Sometimes the simplest details will stop progress.
Thanks to the dude N. Fletch, the problem, avrdude stk500_getsync(): not in sync resp=0x30 error for Arduino Uno, was fixed!
A shoutout to RobotGrrl, Michael Overstreet and others at the Robot Hacks community for their help and encouragement!
